Thursday, October 29, 2009

Pattern is in the Mail

Wow, that took a lot of time to get this first pattern ready, from start to finish, but I'm finally done with the details and all ordered patterns are in the mail and on the way to their new owners.

If anyone else wishes to purchase this pattern, click on the Paypal button up there at the top left of this page.(Where it says "Buy Now") You send me $9.00 which includes shipping and I'll send you this "Let It Snow" pattern.
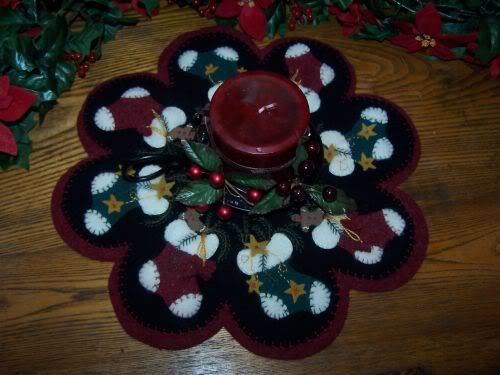

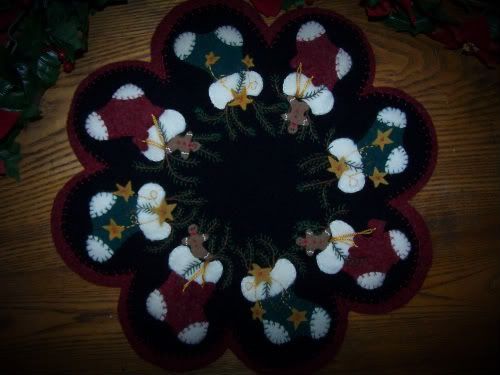
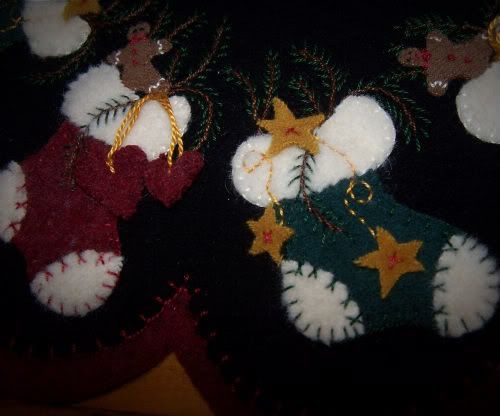
Next pattern to work on is this design from last year. It's my most favorite Christmas design that I've ever done. It's really not difficult to make and while I make this one, just like the "Let It Snow" candle mat, I'll give a little tutorial along the way.
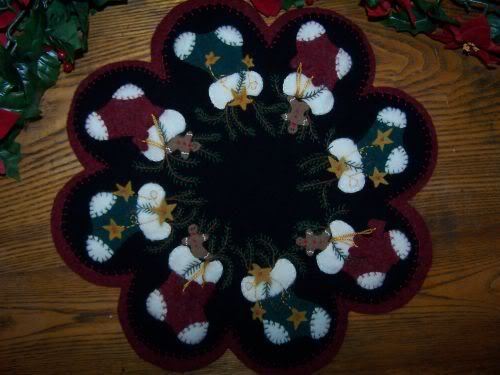
There's a lot of embroidery stitching with this and that's what takes the most time. Those pine branches are tedious to stitch but it's easy stitching.
I'll get started making the candle mat and writing the pattern intstructions tomorrow. Today is house cleaning/laundry day.
Speaking of laundry, every time now, while doing laundry and throwin a dryer sheet in the dryer, I think of my two daughters, Jen and Rach, and I have to laugh.
Since probably their early teens, both girls, when living at home, would do their own laundry for the most part. I'm no dummy ... I hate washing clothes so why not teach them early to wash their own? Anyway, my little trick to saving $$ on dryer sheets is to only use half a dryer sheet for each load. They are easy enough to tear in half and it always seems to work fine for me ... and really saves on the cost too. I would NEVER see whole, used dryer sheets laying around so I just assumed that both girls were doing the same thing ... only using half the dryer sheet, as I taught them.
I just recently learned from Rachel that all those years while doing her own laundry, she used a whole drying sheet but to avoid my wrath, she would tear the sheet in half and then throw BOTH into the dryer. She tricked me all those years and I never suspected.
There's more to this story however ....
So one day, not too long ago, I was relaying the Rachel/dryer sheet trickery stunt to my precious Jen, who need I say, is absolutely the most perfect daughter any parent would want to have. She would never do anything as devious as trick her mother for YEARS with a dryer sheet stunt like her sister.
Well, guess what?
She tricked me for years doing exactly the same thing! She's 27 now so she kept that a secret for a long time.
And the really funny thing is .. neither one knew that the other was doing exactly the same thing!
I'd say at the very least, as punishment, my daughters should owe me mulitple boxes of Bounce dryer sheets.
Doing some quick math in my head ... each girl giving me 10 years worth of dryer sheets = 20 years of dryer sheets.
If I tear those dryer sheets in half, I'll have 40 years worth of dryer sheets .... more than enough to last the rest of my lifetime.
Happy day everyone!

Tuesday, October 27, 2009

Let It Snow! : Tutorial #3 FINISHED!

Haha, I know I'm thinking, "wow, isn't she done with this candle mat yet??" It seems like it's taken forever to finish but that's only because I spent most of the time perfecting the pattern itself, getting it ready for printing.

Just to remind y'all, this is my own design. Please don't steal it! Purchase a pattern. Then, as long as you remember to give me the proper credit as the designer in your seller listings, you can do whatever you wish with the design.
Last year, for selling on Ebay, I made different sizes of candle mats, pinkeeps, and mugrugs, using this design. Once you've purchased the pattern, use your imagination to create whatever you wish with the design. I'm really anxious to see your results!


Let's finish this candle mat up today, ok?

I've embroidered the big snowflakes on which was shown in the last tutorial and now all I need to do is add the french knot falling snow above the snowman head. I start by making an arch with the french knots and just filling in from there. It doesn't have to be perfect, just try to space them evenly above his head.
Now it's time to center the mat onto the white background. Wool tends to stretch easily so even if your background is cut out exactly, you still have to work with those scallops to get them aligned evenly onto the white background. Taking one scallop at a time, measure and pin the blue onto the white, making sure that 1/2" of the white edge is showing. Blanket stitch through all thicknesses and it's looking like a completed candle mat now!

So at this point, if you've nicely tucked in and hid those threads on the backside, your mat is finished, if you want it to be. It also looks nice to blanket stitch through that single thickness of the white edging too.
I prefer to finish off that outside edge, so let's put a backing on this just to make it extra nice and thick.

Adding a backing to this, is an extra expense because of the extra wool that is used, but it's really worth it to give the mat a really nice finished look and feel. You can see from the picture how nice and thick this is now and once it's steam pressed, it lays so nicely on the table too.
Yeap, here's the finished "Let It Snow" candle mat. I just need to take it to the ironing board and steam press the back.

I received a question the other day about what size needles I use. I have to laugh at that question ... not because it's a silly question ... it's actually a very good question. It's just that I really don't know how to answer it! I don't know what size needles I use!
This is a picture of the pincushion that I use everyday. It's huge, yes. It has probably at least a dozen needles in it, all different sizes. When I need a needle for whatever I'm doing, most times, I just randomly grab a needle out of that mess and if the thread that I'm using doesn't fit through the eye of the needle, I put it back and grab another. haha ... sorry, I can't help any more than that! Just buy a pack of assorted sizes and stick them into your favorite pincushion. If anyone out there knows the answer to that question, tell me so that I'll know what to buy next time I need the needles!


Sunday, October 25, 2009

Let It Snow : Tutorial #2

This little tutorial will be the introduction to the beginning of a line of patterns from Cath's Pennies Designs. Hopefully, if all goes well, the pattern will be finished and ready to mail this Thursday.

NOTE: This is NOT a free design to use. The pattern for this Candle Mat can be purchased. This is a relatively easy pattern to make and my hope is that seeing pictures of it in the process of being made will make it even easier to make.
But please, buy the pattern. Just let me know of your interest and I'll happily put you on the preorder list. Special Blog preorder price is $8.00 including shipping. (For US and Canada only. International shipping costs would apply to orders outside the country)
Just let me know of your interest. Thank you for not stealing my designs. :)
For those who wish to preorder, my Paypal address is cwagner02@comcast.net . Your $8.00 payment may be sent there up until Wednesday night. After that, shipping charges will raise the price.

Let's get started on part two of the tutorial.....


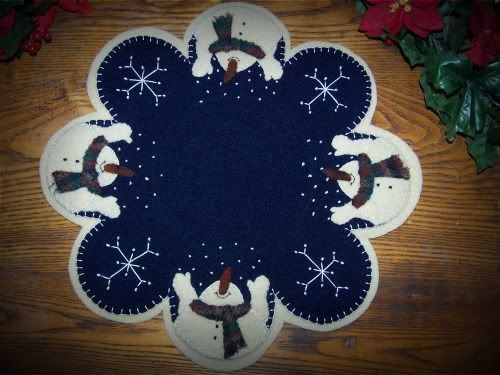
This is what we're making. Let It Snow is all wool, but it can also be made with woolfelt.
Here, I've blanket stitched all of the snowmen on and now, because I have this thing about pressing, I've taken this to my ironing board. The steam from the iron will press these snowmen nice and flat.
I've learned from my mistakes .... ALWAYS use a pressing cloth when steam ironing your wool, otherwise your wool will have shiney iron marks. I use a soft flannel pillowcase here. I'll press the backside of the mat using lots of steam.
Now, I'll blanket stitch on the scarf and the carrot nose. I used black pearl cotton thread for the scarf and a matching gold/orange pearl cotton for the nose. Embroidery floss will work fine too ... don't buy pearl cotton for just the little bit that you would need for the nose. I happen to have the right color, so I use it.
Using black thread, I've backstitched the smile on my snowmen, giving them life .. my favorite part. :)
The snowflake is just embroidered stem stitching. The snowflake is 1 1/2" high and wide so I measured that out and using a chalk pencel, I lightly drew in the lines.
I used #5 DMC cotton thread for the snowflake and french knots.. Finished one, need to do 3 more and then I'll be ready to give the snowman some snow above his head.
I should be able to finish the mat up this evening and show the finished mat in the posting either tomorrow, if I've the time or for sure on Tuesday.

GO HERE for the final Tutorial Steps for this "Let It Snow" Mat.


Happy day everyone!
Friday, October 23, 2009

Let It Snow : Tutorial #1

This little tutorial will be the introduction to the beginning of a line of patterns from Cath's Pennies Designs. Hopefully, if all goes well, the pattern will be available for sale in a week or so.

For years, I've been asked to sell patterns of the things that I make, but I put it off ... just not willing to take the time away from sewing to write the patterns. It's time now and I'll start with my very popular Wool Candle mat that I made and Ebay sold last year.

EDIT: This is NOT a free design to use. The pattern for this Candle Mat can be purchased.
This is a relatively easy pattern to make and my hope is that seeing pictures of it in the process of being made will make it even easier to make. But please, buy the pattern. Just let me know of your interest and I'll happily put you on the preorder list.

Thank you for not stealing my designs. :)
Let's get started.


"Let It Snow" is made with 100% wool but it can easily be made with woolfelt if you wish. It measures about 13-14" across.

I use #8 DMC Pearl cotton threads for this along with #5 DMC for the snowflakes. Ecru, which is the main color that I will use, is easy to find at Joann Fabrics.

I've traced the pattern onto Freezer paper and then ironed the paper onto my dark blue background wool. You could trace the design right onto your wool with chalk, but I prefer the freezer paper because the paper holds the wool tight while you cut so there's no fear of stretching wool and mishappend shapes because of it. This is especially important with these scallops. Freezer paper gives you the exact shape.
With natual white wool, I've ironed the freezer paper snowman body pieces. 4 bodies with 8 arms. This is where I was going to change the design from last year. I considered making the snowman and arms as one complete pattern piece but after thinking a little more, I think it would look much better with the arms added on, so that's how it's staying! Those pieces are carefully cut out and now the sewing part starts ...
The arms and body are lined up, pinned and then blanket stitched onto the blue scallopped edge. This just looks like a big white blob right now but the fun part of giving the snowman character/a face will come next.


For the next steps ....  Tutorial #2 GO HERE!


Happy Day and Weekend everyone!

Thursday, October 22, 2009

Fall Means Christmas

As much as I'd love to stick with Fall and Halloween and all the decorations/designs that go along with it, I know that I have to keep just a bit ahead of the seasons when it comes to selling my penny rugs.
I have sooooo many good ideas for designs for this fall and Thanksgiving, but not enough time to make them. Since I HAVE to get going with the busy Christmas holiday season, I'm going to pack away my fall idea designs. I'll get them out again next August ...they will become next year's patterns.
But darn, I had a cute turkey one in my head that I'd love to do this year .... so maybe, just maybe, I won't pack all the ideas away.

Anyway, for this Christmas season, I'm going to branch out in another direction and try offering a few of my designs as PATTERNS!

I've come to realize that there are a lot more sewers/stitchers out there in blogland and Ebay than there are buyers of finished items. That realization, along with a lot of queries as to when I will offer my designs as sellable patterns, has pushed me into the decision to focus SOME of my time on making patterns to sell.

Two of my favorite hoilday designs from last year will become patterns.

This one was really popular last year. "Let It Snow" will be the first pattern that I'll offer. I'm working on this one right now. It will have some minor adjustments in the design so I will actually make one before actually printing the pattern for it. I think I'll blog the steps to making this along the way.

After the "Let It Snow" is printed, I'll focus on this one next. Oh, how I love this one and it's going to be difficult to share this one with everyone. This design is up there with some of the most favorites of all the designs that I've ever made ... and I've made a lot.

There are lots of ridiculous details with this design but it's worth the time and effort just because it's just so darn nice when it's finished.
So there ya go ... a preview of what is to come. I have a lot of work that will be involved with doing this so my time spent actually sewing will be shortened ... which is why I've put off offering patterns to begin with. I love to sew so anytime that is spent doing something else takes me away from what I love.
But it will be done, and I will blog about it the entire time. Branching out can be a good thing, hopefully.
Tomorrow will start the beginning of the "Let It Snow" tutorial.
Happy Day Everyone!